
So you've made an OSF account — awesome! Now you’re ready to get started, but what should you do first? Below are some quick steps you can take for getting your first OSF project off the ground.
1. Making a project on OSF.
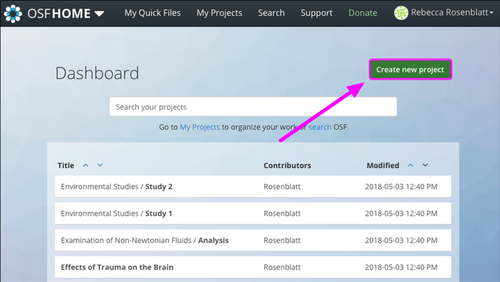
A project page is your digital workspace or bulletin board for a current research project. It is here you can inform readers about the project, link to related articles/resources, collaborate with colleagues, and share out your data, research materials, or analytical code. To get started, navigate to https://osf.io and make sure you are logged in. On this page you will see a green “Create new project” button. Clicking this button will prompt you to give your new project a title, after which you can jump into the project by adding contributors. There's also a few more things you can do, covered in this helpful guide for finishing the setup.
2. Adding Contributors.
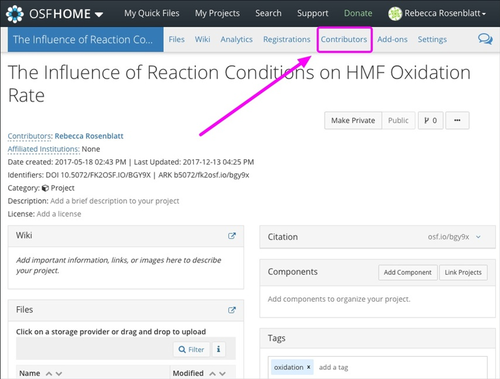
Once your project has been created, add your contributors and get to work! This gives access and credit to others working on the project. To add collaborators, go to your new OSF project page and click the “Contributors” tab at the top of the page. From there you can invite colleagues to join the project and set permission levels. See this guide for more information on admins, read-write, and read-only permissions.
3. Adding materials / code / preliminary data.
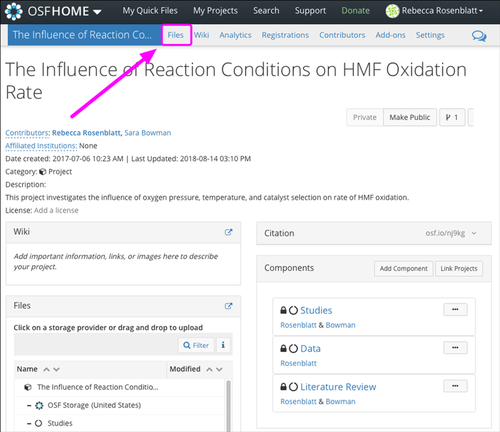
Uploading research materials, analysis code, or preliminary data is a great step to take your project to the next level. Adding any of these items greatly enhances your project’s usefulness, both in the immediate and long term. It is a great way to share the latest materials with your research team, and begins your open repository for your current research project. Adding files to a project is quite seamless through the Files tab at the top of the page, or through the File tree on the left hand side of the project page (see this guide for more info). You can also integrate 3rd party storage add-ons through the Add-ons tab. Add-ons allow you to connect your OSF project directly to a cloud-based storage provider, helping you manage your resources in one place.
4. Licensing your project.
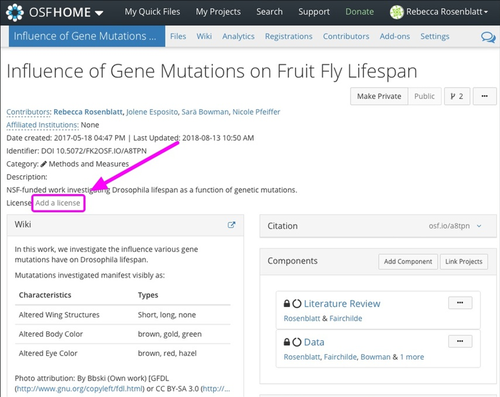
Licensing your project makes clear how others can (re)use your work. To set a license for your project, go to the project homepage and look for the License section near the title of the project. There you can pick the appropriate license and be good to go! For information on the available licenses, please see this guide.
Now your project is set up and ready for use. Make your project public when you’re ready to do so (or share privately with view-only links). And make sure to check out our many help guides to fully unlock the capabilities of the OSF!
More Resources:

6218 Georgia Avenue NW, Suite #1, Unit 3189
Washington, DC 20011
Email: contact@cos.io

Unless otherwise noted, this site is licensed under a Creative Commons Attribution 4.0 International (CC BY 4.0) License.
Responsible stewards of your support

COS has earned top recognition from Charity Navigator and Candid (formerly GuideStar) for our financial transparency and accountability to our mission. COS and the OSF were also awarded SOC2 accreditation in 2023 after an independent assessment of our security and procedures by the American Institute of CPAs (AICPA).
We invite all of our sponsors, partners, and members of the community to learn more about how our organization operates, our impact, our financial performance, and our nonprofit status.